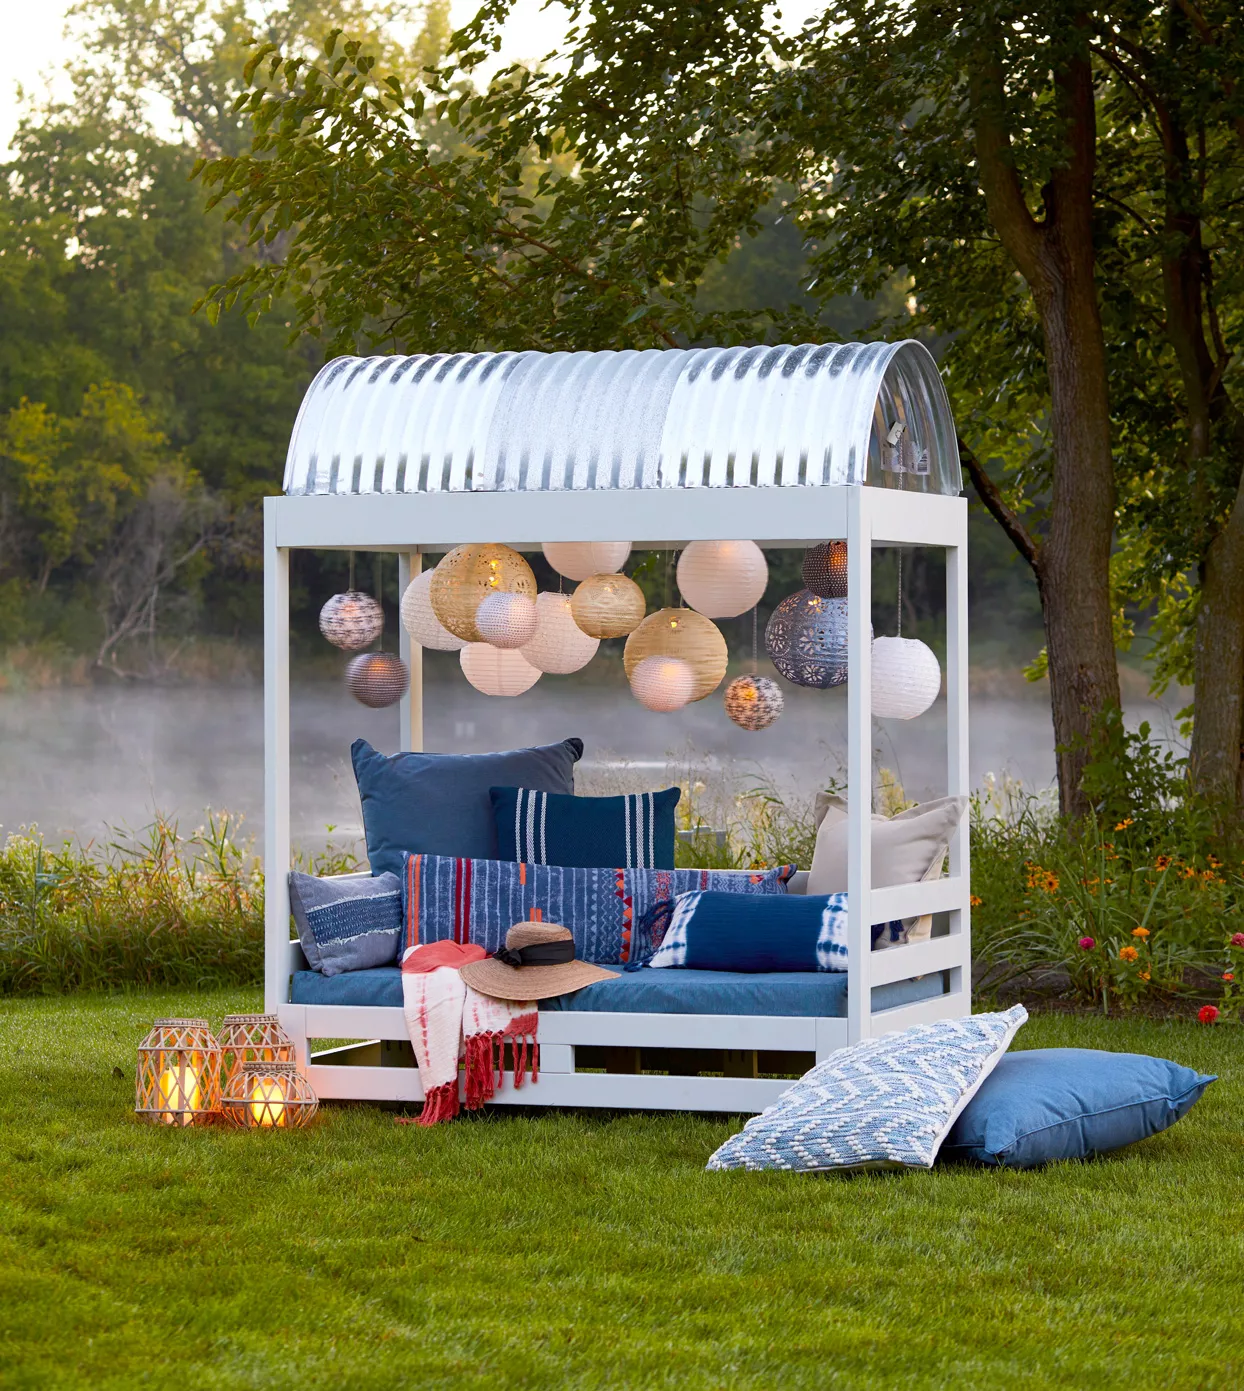
Build and accessorize an outdoor retreat, then kick back and enjoy the view.
- Working Time: 1 day
- Total Time: 3 days
- Skill Level: Advanced
A DIY cabana provides the destination. How you trick it out brings the atmosphere. This backyard project turns cedar boards and galvanized window well sections into a shady outdoor retreat. After following our instructions for how to build the cabana, add your own personal touch with outdoor lighting, curtains, pillows, plants, and other accessories.
If relaxing with a glass of wine after a long day is your idea of perfect, for example, take a load off under the soft glow of pretty paper lanterns. To get this eclectic look, select lanterns in a variety of sizes, colors, patterns, and textures, and place a battery-operated LED tea light in each one. Hang lanterns using Command outdoor light hooks (found with the holiday supplies in stores) and string, rope, or fishing line. Up the comfort level for you and your guests with large floor cushions, cozy outdoor blankets, and citronella candles.
Note: All material specified in the cut list is red cedar. Nominal lumber sizes are given; actual sizes may vary.
Equipment / Tools
- Miter saw or circular saw
- Drill
- Kreg pocket hole jig
- Clamps
- Power sander
- Paintbrush
- Stapler
Materials
- 16 8-foot lengths of 2×6 cedar
- 3 8-foot lengths of 2×8 cedar
- 2 8-foot lengths of 2×2 cedar
- Exterior wood glue or polyurethane glue
- 126 2-1/2-inch Kreg Blue-Kote pocket-hole screws
- 10 2-1/2-inch wood screws
- Wood filler
- Exterior primer and paint
- Canvas strapping
- Staples
- 38-1/2×65-inch outdoor foam
- 5 yards of outdoor fabric
- Zipper
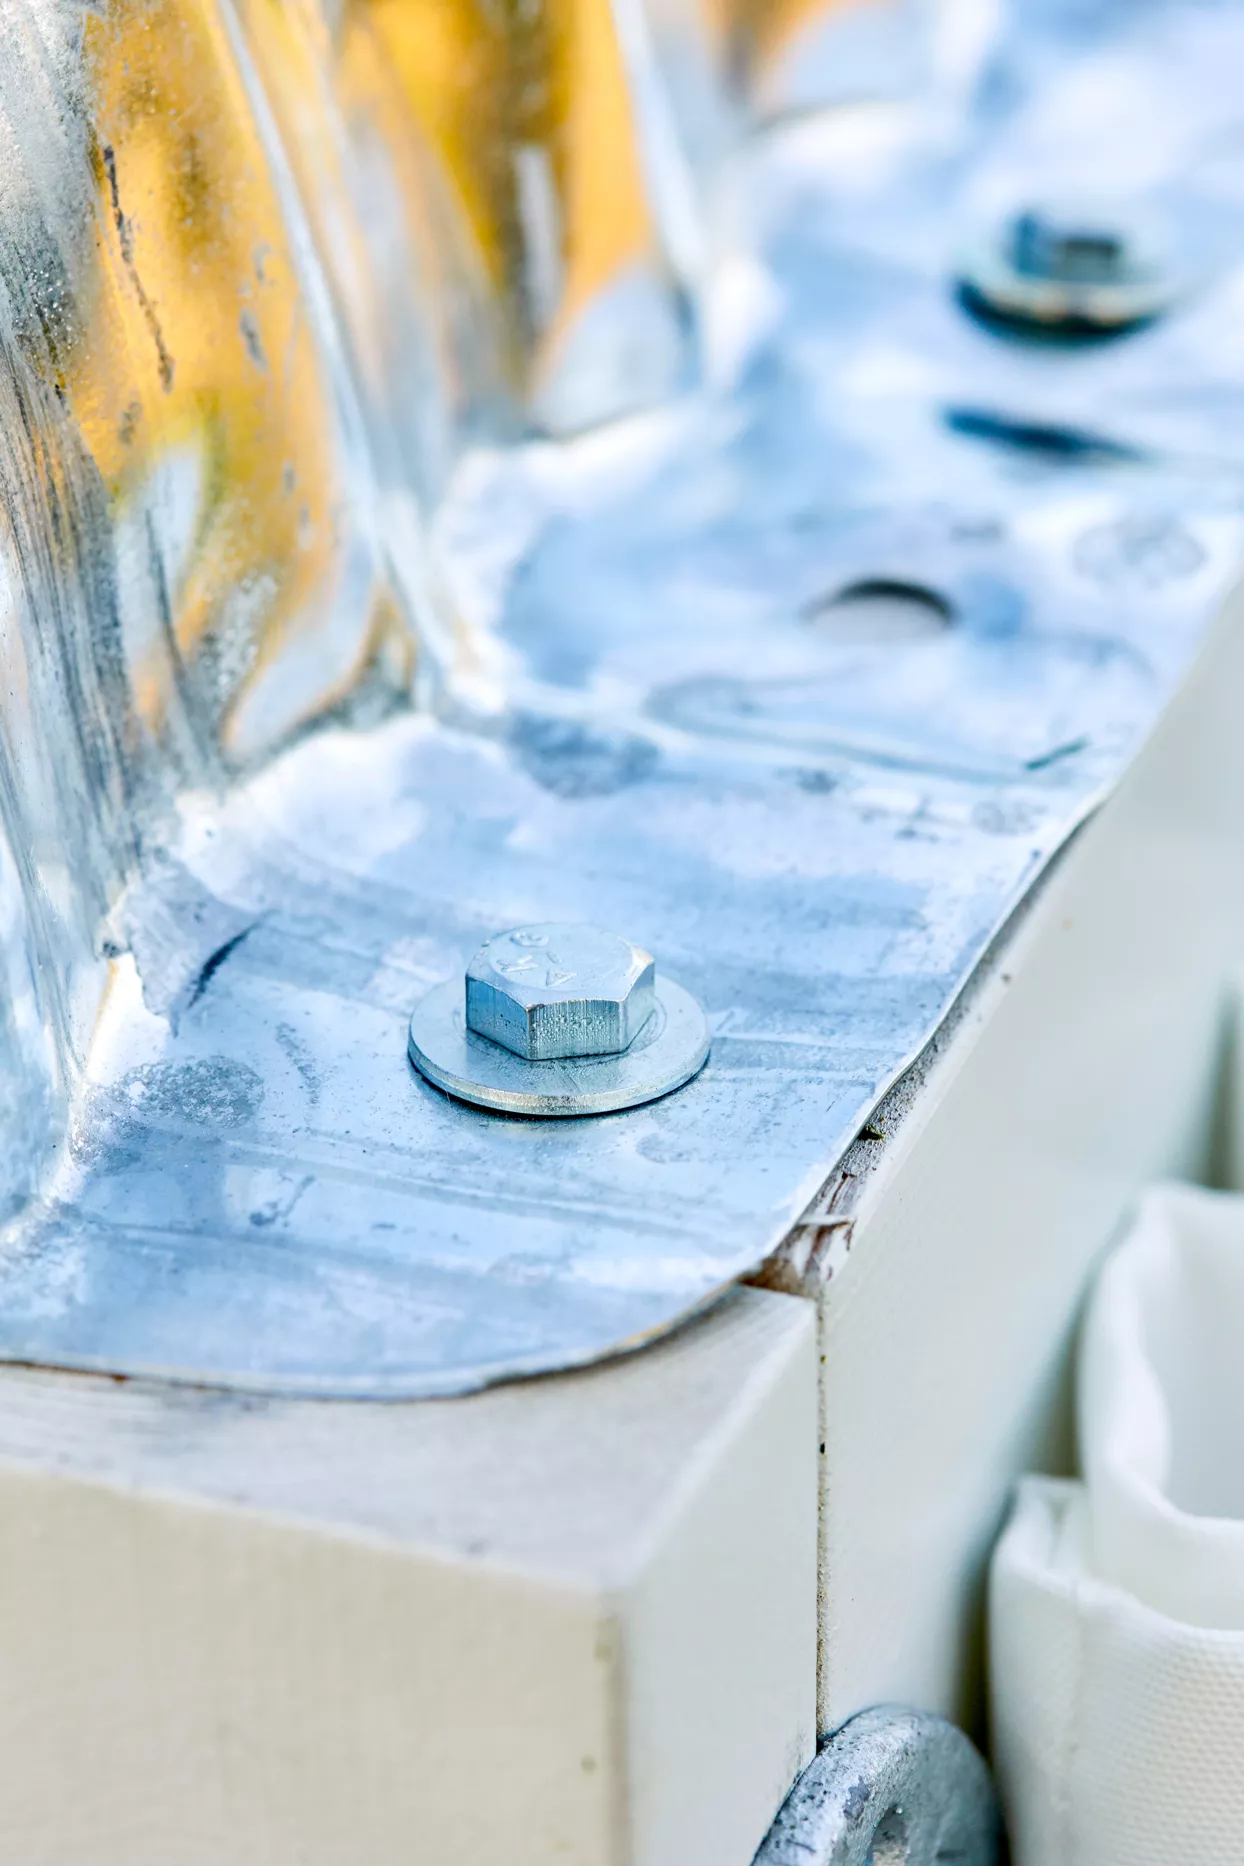
- 3 37-inch-wide, 24-inch-tall galvanized window well sections
- 18 2-inch lag bolts
-
Cut and Prep Boards for Front Panel
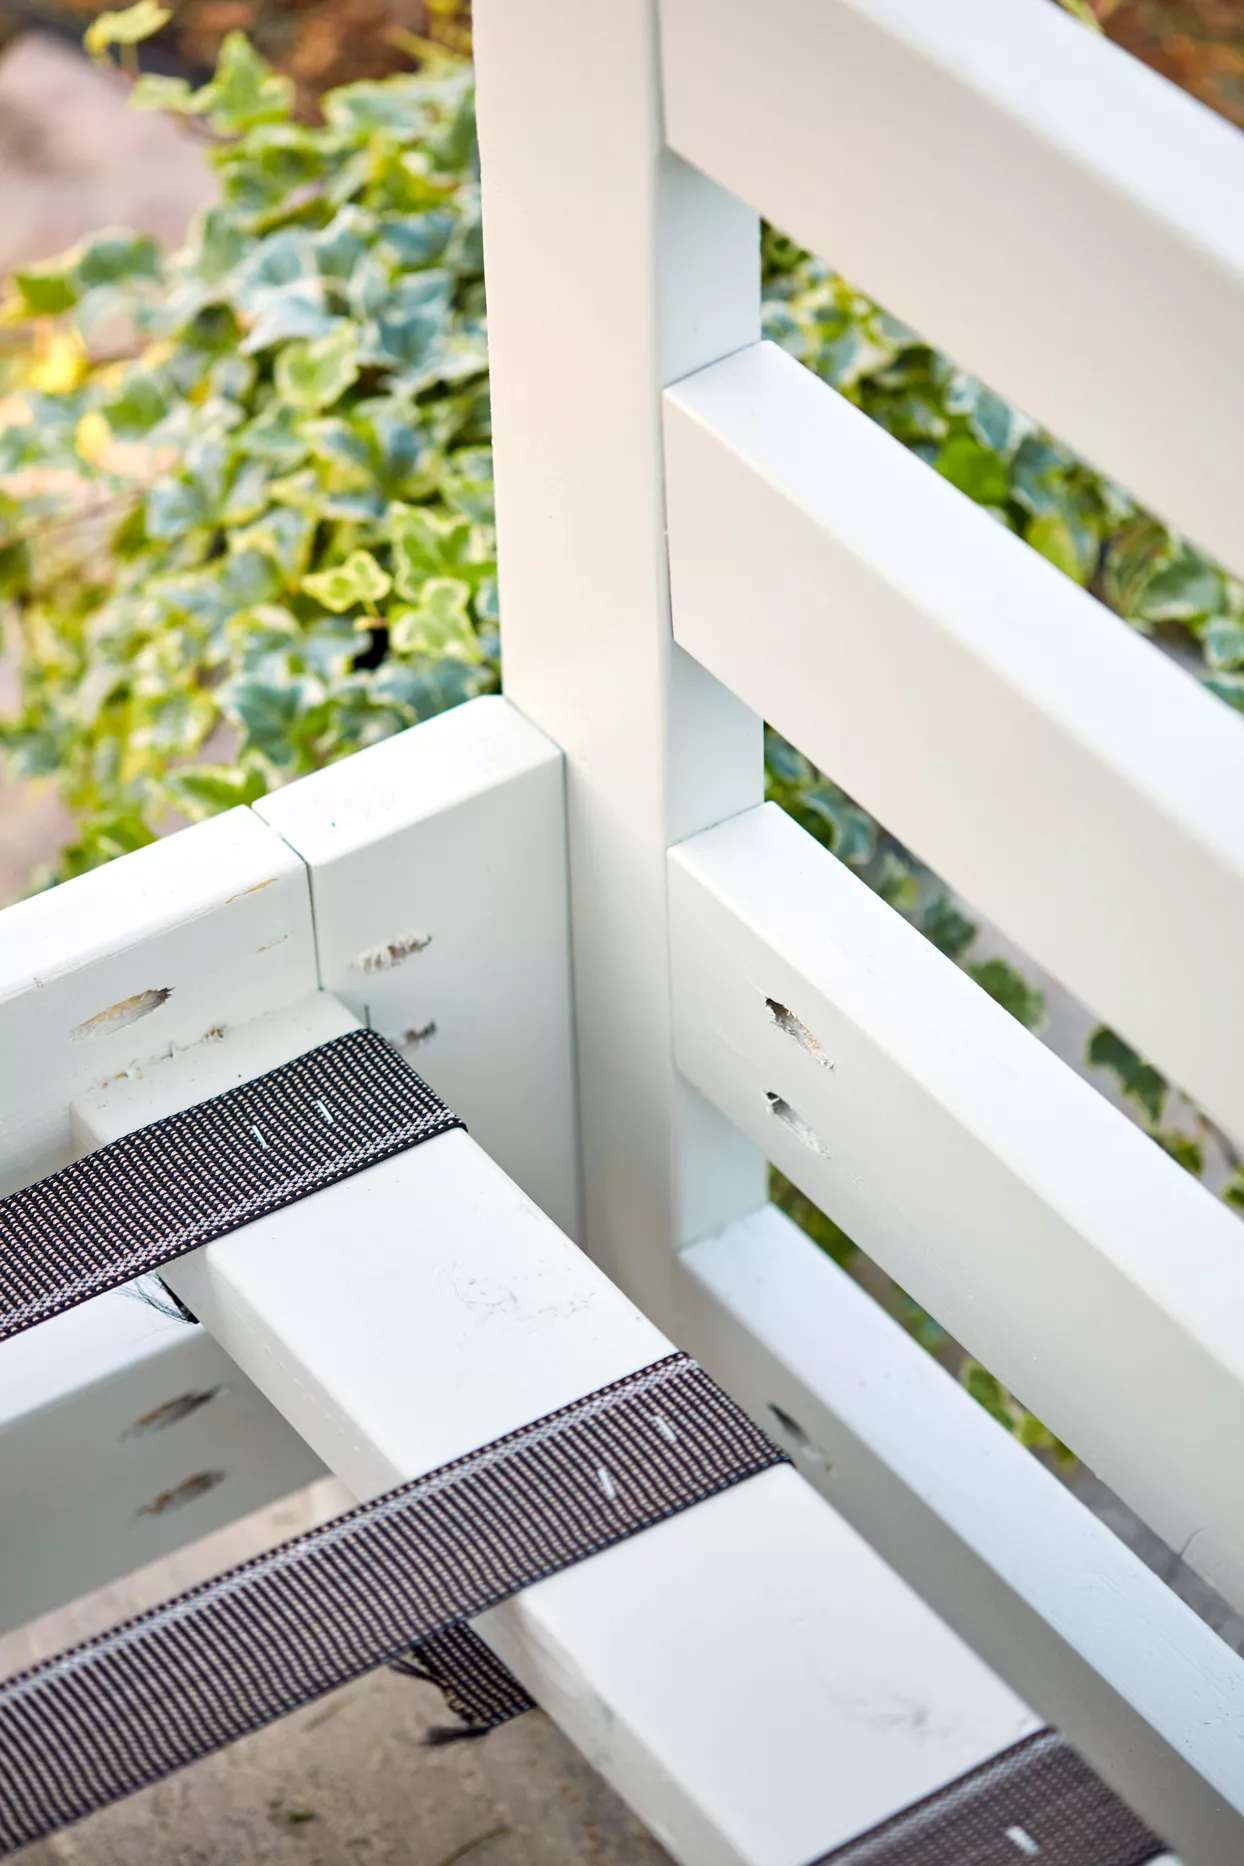
Cut all boards according to the cut list. To prep the boards for the cabana front panels, drill sets of two pocket holes in both ends of the front rungs A, in both ends of the vertical front center support B, and at the top and bottom along the long edge of the vertical front side supports C. (Note: All pocket holes should be placed on the sides that will face the interior of the finished cabana.)
-
Assemble Rungs and Supports
Referring to the illustration in the step above, glue, clamp, and assemble rungs A and support B using screws. Add side supports C to each side of the assembly, making sure they’re flush with the top A rung and the extra pocket holes are facing out (toward the eventual side panel) before securing with wood glue and screws.
-
Prep and Assemble Side Panels
To prep the boards for the cabana side panels, drill sets of two pocket holes at each end of four horizontal side rungs D and the short apron E. To assemble, place the first D rung 3 inches up from the bottom of the vertical posts F; secure with wood glue and screws. Add the remaining three D rungs, spacing each rung 3 inches above the previous rung.
Secure the top E apron between the posts, making sure all edges are flush at the top to complete the first side panel. Repeat the process to assemble the second cabana side panel.
-
Prep and Assemble Back Panel
To prep the boards for the cabana back panel, drill sets of two pocket holes in both ends of each horizontal back rung G, and at the top and bottom along one long edge of two of the vertical back supports H. Referring to the illustration and beginning at the top so boards are flush, secure a horizontal G rung to two vertical H supports (one should have pocket holes facing outward and will be a side support; the other should have no pocket holes and will be the center support). Repeat with the remaining G rungs, spacing them 3 inches apart and gluing and clamping all pieces as you screw them together.
To complete the back panel, repeat this process to attach the remaining G rungs and H support to the assembly. (Be sure the pocket holes in H face outward toward the edge.)
-
Assemble the Cabana
You should now have four completed cabana panels. To begin assembling them into one unit, clamp the front panel to your work surface, and then clamp one of the side panels to the front panel, making sure the bottom of the assembly is flush. Using the existing pocket holes from Step 1, glue and screw them together.
Repeat the process on the opposite side with the remaining side panel.
-
Attach Apron to Top
Add a set of two pocket holes at each end of both long aprons I. Clamp and glue one I apron in place at the top of the assembly between the two side panels so boards are flush; secure with screws. Set the other aside.
-
Attach Back Panel and Apron
Stand up the assembly on the floor, and screw the back panel to the assembly in the same way using existing pocket holes in the side supports, wood glue, and clamps. Repeat Step 6 using remaining I apron.
Using wood screws, attach the upper apron supports J to the I aprons, so the boards are flush at the top of the assembly.
-
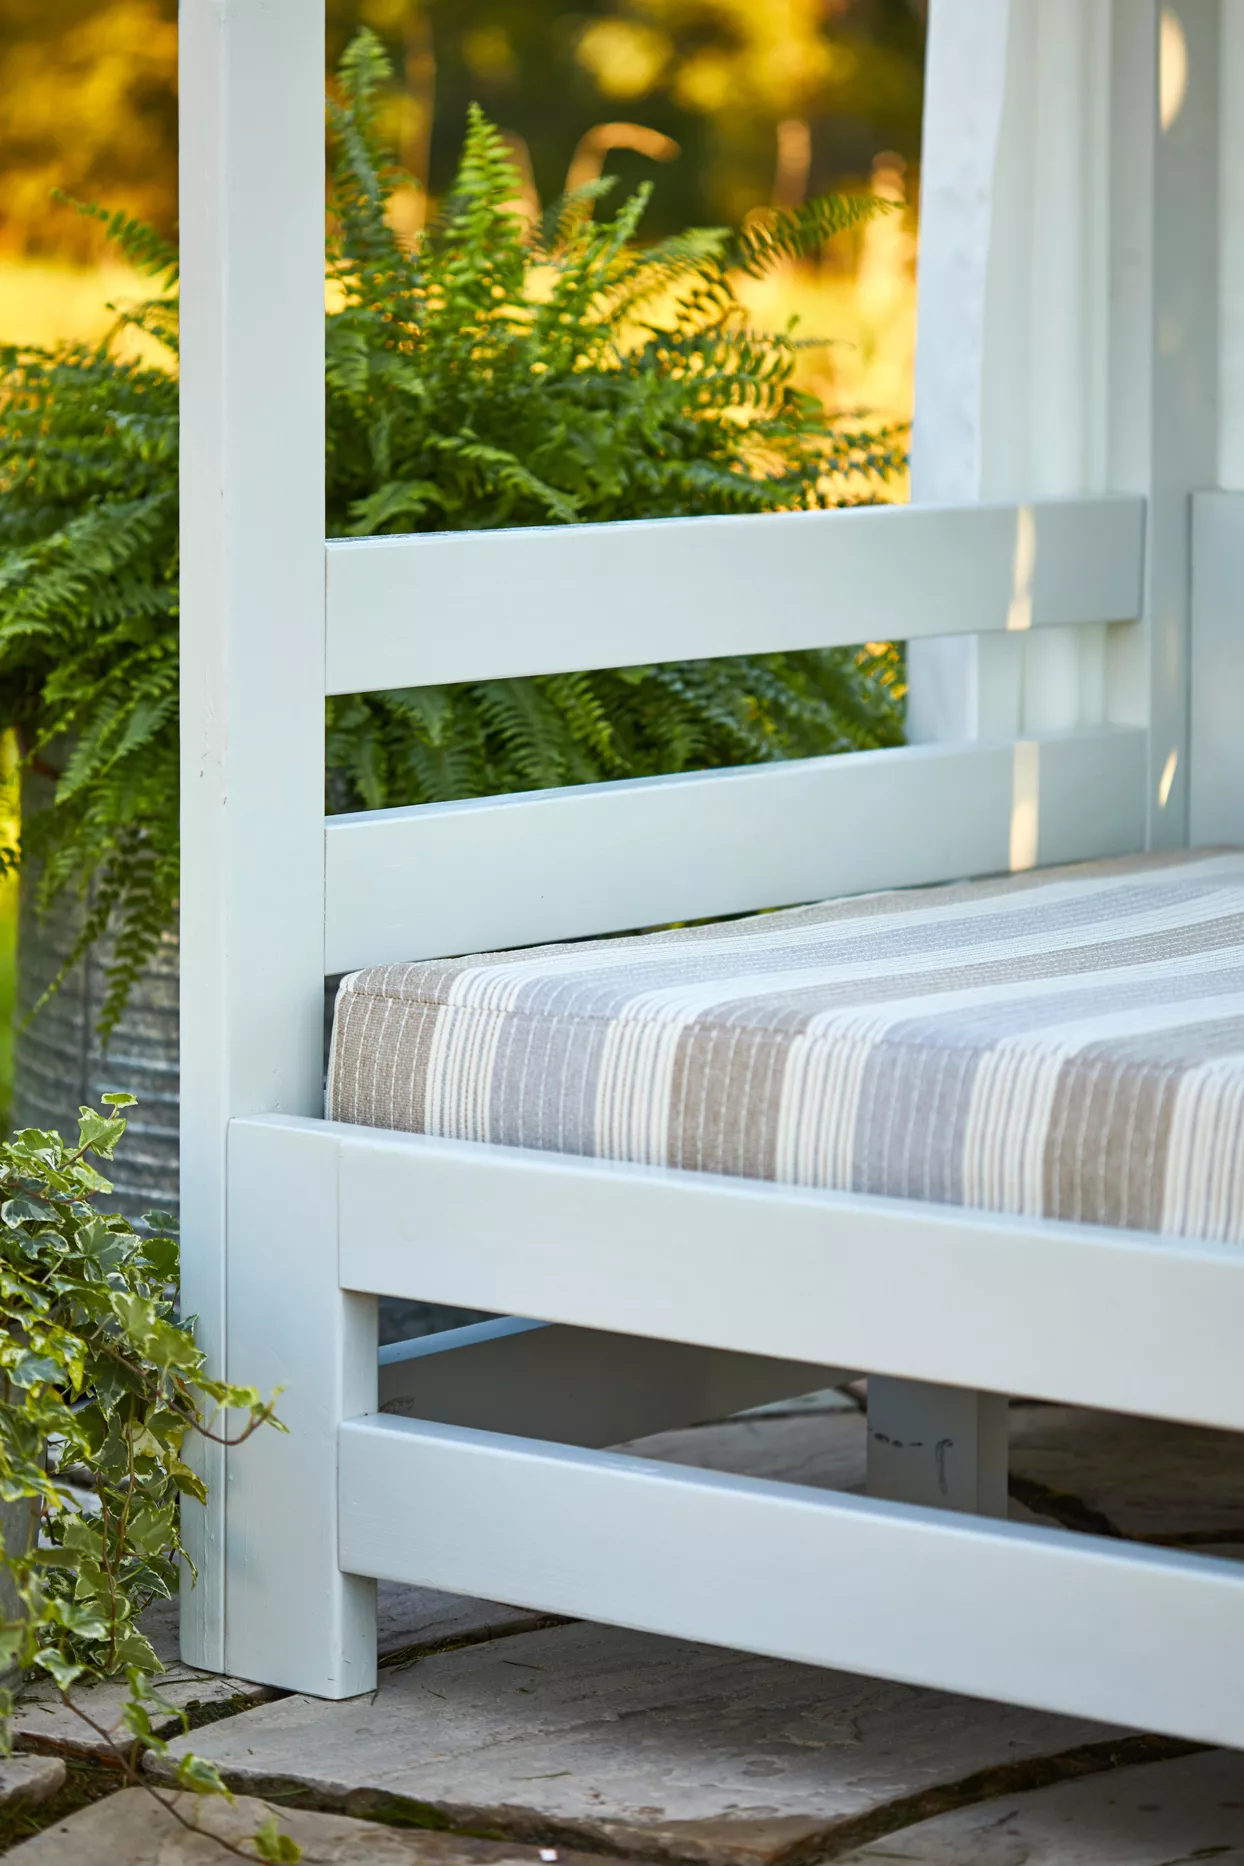
Prep and Assemble Seat
To prep the boards for the seat, drill a set of two pocket holes in each end of each of the five seat slats K and in one end of each of the slat supports L.
To assemble the seat, attach an L slat support at the center of each horizontal K seat slat. Space the five seat slat units evenly across the front rung A and parallel to the cabana side panels. Attach them to the A and G rungs second from the bottom on the front and back panels.
-
Sand and Paint Cabana
Fill all visible pocket holes with wood filler; let dry and sand smooth. Then sand the entire cabana and wipe away dust. Prime and paint the cabana, allowing to dry between coats.
-
BLAINE MOATS Add Seat Strapping
While the paint dries, cut the strapping into six 68-inch lengths. Once the paint is completely dry, staple one of the straps around a K seat slat at one end. Stretch the strapping across the seat, wrapping and stapling the other end to the K slat on the opposite end.
Repeat with the remaining straps, spacing them evenly across the K slats.
-
BLAINE MOATS Make Seat Cushion
Using outdoor fabric, sew a box cushion cover for the foam cushion. Add a zipper if desired so you can remove and launder the cover.
-
BLAINE MOATS Finish with Window Well Sections
Place the three window well sections on top of the assembly, so they rest on the upper apron supports. Overlap the center section as needed. Secure with bolts. Accessorize the finished cabana as desired.